


Post-winter deck maintenance is essential to keep a deck safe, attractive, and long-lasting after harsh winter conditions. Start by cleaning away dirt, mold, and old residue, inspecting for loose boards or fasteners, and planning to stain or seal areas that show wear to protect the wood.
Kick off the season with smart deck care to restore your deck’s beauty and safety. From deep cleaning to checking for damage and applying protective stain or sealer, each step is designed to prevent small problems from turning into costly repairs.
This guide walks through cleanup, repairs, and finishing touches with easy-to-follow tips. With these practical actions, your deck will stay strong, safe, and inviting all season long.
Essential Post-Winter Deck Maintenance Steps
Clean the deck surface, check fasteners and boards for damage, and remove any mold or trapped debris. These actions restore safety, prepare the wood or composite for staining, and stop small issues from becoming costly repairs.
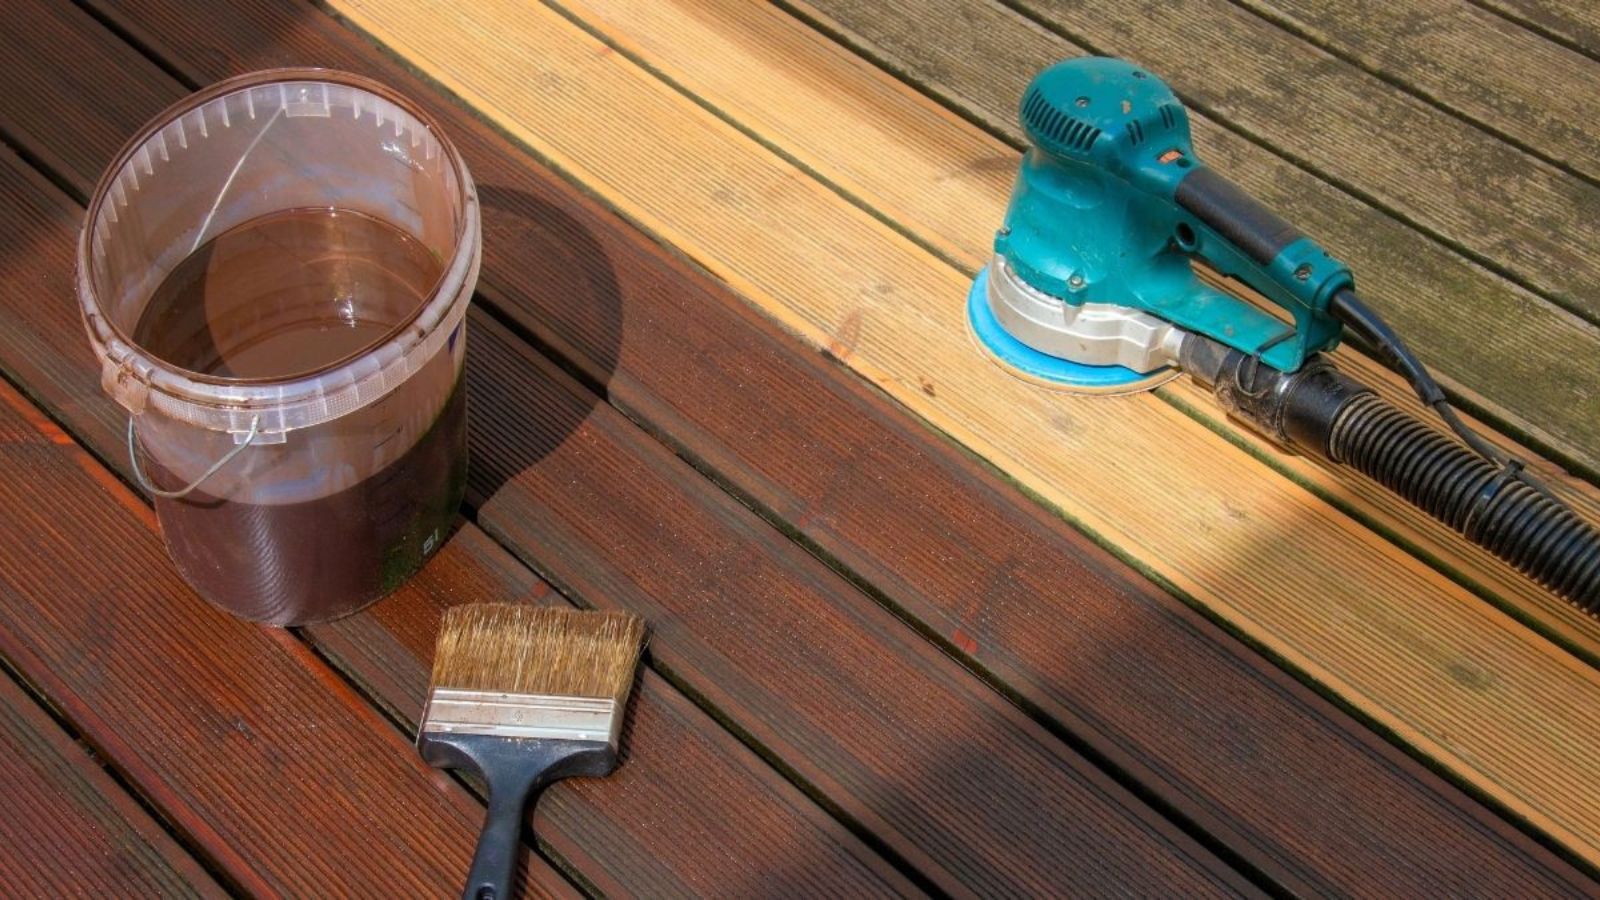
Thorough Deck Cleaning After Winter
Start by removing loose debris with a broom or leaf blower, focusing on gaps between boards where water collected. Then rinse the deck with a hose to loosen dirt and salt; use a pressure washer on a low setting (under 1,500 psi) and keep the nozzle at least 12 inches away to avoid damaging wood fibers.
For stuck-on grime, apply a deck cleaner made for the material—oxygen bleach for wood, or a composite cleaner for synthetic decking. Scrub with a stiff nylon brush along the grain, then rinse thoroughly. Allow the deck to dry 24–48 hours in warm, dry weather before any sanding, repairs, or sealing.
Inspecting for Winter Weather Damage
You should inspect the deck board-by-board and on the underside for cracks, split boards, or soft spots caused by freeze-thaw cycles. Probe suspicious areas with a screwdriver; soft or crumbly wood indicates rot that likely needs board replacement.
Fasteners and connectors should be inspected next. Tighten or replace popped, rusted, or loose screws and nails with corrosion-resistant options. Examine railings, stair stringers, and ledger connections for movement, gaps, or moisture stains. Addressing these issues is a critical part of post-winter deck maintenance.
Addressing Mold, Mildew, and Debris
You should treat mold and mildew promptly to prevent staining and decay. Apply an EPA-registered fungicide or a diluted oxygen-bleach solution, following label directions. Let it dwell 10–15 minutes, scrub with a brush, then rinse well.
Remove debris trapped between boards and around posts, which can hold moisture and cause rot. Trim nearby plants and move planters periodically for airflow. Light sanding may be needed on persistent mold spots before sealing or staining. These actions ensure thorough post-winter deck maintenance.
Staining, Sealing, and Minor Repairs
The deck needs a clean, dry surface, the right stain or sealer for the wood, and simple fixes for small damage. Doing these steps in the right order helps the finish last and keeps the deck safe to use.
Preparing the Surface for Staining
You should start by sweeping and washing the deck to remove dirt, pollen, and mildew. Use a deck cleaner or a mix of oxygen bleach and water; scrub with a stiff brush or use a pressure washer on low pressure to avoid gouging the wood.
After cleaning, let the deck dry for 24–72 hours, depending on the sun and humidity. Test dryness by sprinkling water. If it beads, wait longer; if it soaks in, staining can begin. Sand rough spots with 60–80 grit paper to open the grain and remove old finish; then vacuum and tack cloth the dust.
Mask metal fixtures and adjacent siding with painter’s tape and plastic. Work in shaded, dry weather with temperatures between 50–90°F and no rain in the forecast for 24 hours.
Choosing the Right Stain and Sealer
You should pick a product suited to the wood species and desired look: transparent, semi-transparent, or solid or pigmented. Transparent highlights grain but needs more frequent recoat. Semi-transparent balances look and protection. Solid offers the most UV protection and hides imperfections.
Check the product label for water or oil-based. Water-based stains dry faster, resist mildew, and stay more color-stable. Oil-based penetrates deeper into some woods and can give longer wear on horizontal surfaces. Look for UV inhibitors and water repellents.
Apply a test patch on an out-of-the-way board to confirm color and adhesion. Follow the manufacturer’s spread rate and apply with a brush, roller, or pump sprayer, back-brushing to ensure even coverage. Plan for one or two coats as specified and note recoat times on the label.
Repairing Cracks, Splinters, and Loose Boards
You should inspect the deck for small cracks, raised splinters, and loose fasteners before staining. Replace any severely rotted boards. For narrow cracks and splits, use an exterior wood filler or epoxy suitable for decks; follow drying times closely.
Drive loose nails down and replace them with ring-shank or screw fasteners sized for the board thickness. Trim protruding splinters with a sharp chisel, then sand the area smooth. Countersink and fill screw heads and nail holes with a stainable wood filler to keep the surface even.
When boards are cupped or warped but still sound, fastening at more points or adding blocking underneath can stabilize them. Re-check repairs after the finish dries and touch up with compatible stain or sealer where filler or new wood shows.
Support Up Construction
At Support Up Construction, we provide complete residential improvement solutions designed to enhance the comfort, function, and value of your home. From custom decks and railings to flooring, windows and doors, trim work, bathroom renovations, shower remodels, HVAC services, sheds, and pergolas, every project is designed and built with precision by our owner and experienced craftsmen.
As a hands-on builder and designer, our founder personally oversees each project to ensure quality craftsmanship, dependable service, and long-lasting results you can trust.
Ready to upgrade your home?
Contact Support Up Construction today to discuss your next home improvement project.
Comments are closed